Contents
There’s always one. The wedding photo where everyone actually looked happy for once. Soft, because the photographer’s hand twitched a half second early. Or the shot of your grandfather smiling, dug out of an old shoebox. Just barely out of focus. Maybe it’s something smaller, a product photo you snapped for a resale listing, and it looks fine on your phone until you upload it and it turns to mush. None of these need Photoshop. None of them need a free Saturday and a YouTube tutorial either. Most everyday blur gets fixed in a browser tab now. About as long as it takes to boil a kettle.
Here’s what’s actually in this guide. Why photos go blurry in the first place. Where AI genuinely helps, and where it just can’t. The exact steps for fixing one online, no install required. What to do differently depending on what kind of photo you’re dealing with. And the mistakes that quietly make the result worse.
Why Photos End Up Blurry

Blur gets treated like one problem. It isn’t. There are really three.
Something moved while the shutter was open. That’s motion blur. Kids do this constantly. So do pets. So does any dim room, since the camera slows the shutter down to grab more light, and a slower shutter means more time for something, anything, to move. Then there’s focus blur. The camera locked onto the wrong spot. A face goes soft while a fence post six feet back stays sharp, and it’s easy to not notice until you’re looking at the photo full-size later. Neither of those is the same as a photo that’s just small, or compressed to death, and never had much detail to lose in the first place. You know the type. A screenshot of a screenshot. Something that’s survived four rounds of Messenger compression. That’s not really “blurry.” There’s just nothing there to recover.
And that’s the part people miss. AI handles the first two cases well. Genuinely well. The third one is a rebuild job, not a repair. It needs a different approach, and expecting the wrong tool to fix it just wastes time.
It’s also worth saying: blur is more obvious now than it used to be. Photos get viewed bigger, zoomed into, cropped and re-shared, and every one of those steps makes soft detail more visible. A shot that looked fine on a small screen years ago often doesn’t hold up the same way today.
What Actually Happens When AI Processes a Blurry Photo

It helps to know roughly what’s going on, if only so the result stops feeling like magic or, worse, like a gamble.
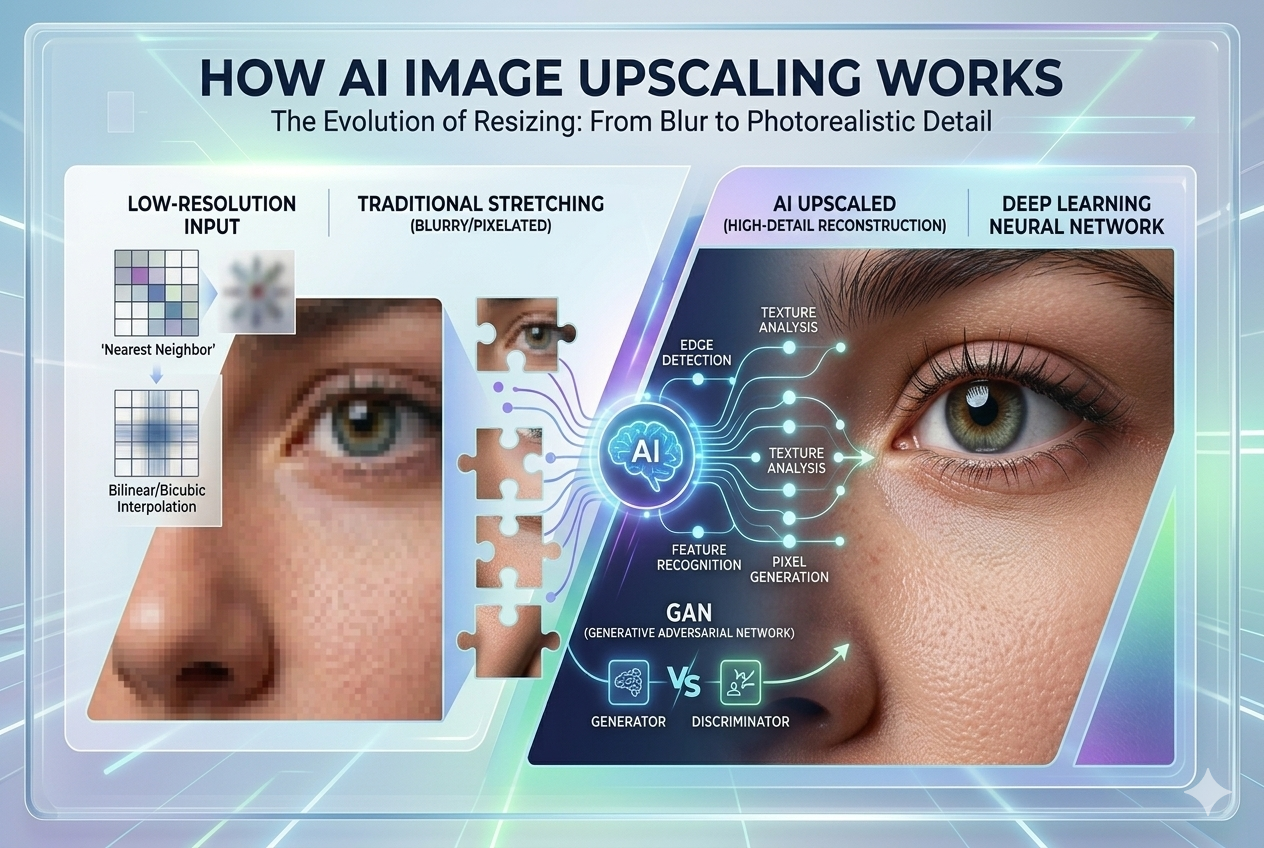
The model behind most of these tools has looked at an enormous number of image pairs, a sharp photo and a deliberately blurred version of the same one, over and over, until it built up a working sense of what detail usually looks like once you remove the blur. When it processes your photo, it isn’t hunting for a hidden sharp version buried underneath, there isn’t one. It’s predicting, edge by edge and texture by texture, what the sharp version most likely looked like, based on everything it’s learned from similar images before. For a face, a jawline, strands of hair, that prediction tends to land close to reality, because faces are extremely well represented in that training data. For something unusual, an odd texture, a pattern the model hasn’t seen much of, the guess gets shakier.
That’s also why running the same photo through twice doesn’t always help. The model already made its best prediction the first time. A second pass can sharpen further, but past a certain point it’s not recovering more truth, it’s just amplifying its own guess.
Can AI Actually Unblur a Photo?

Usually, yes. But there’s a real limit. Better to know it now than get disappointed later.
Sharpening models learn from huge sets of blurry and sharp image pairs. So they’ve picked up a rough sense of what an eye, or a strand of hair, or a piece of fabric is supposed to look like once it’s in focus. Point one at a softly out-of-focus portrait, and it fills that detail back in within seconds. No masking by hand. No sitting there at midnight dragging sliders around, hoping something looks right. Faces in particular tend to come back looking convincing, since the model has seen an enormous number of them. Fine print, tiny text, or intricate patterns are a rougher ride, since there’s less room for the model to guess correctly.
What it can’t do is invent detail that was never captured. Severe motion blur, the kind where a whole body smears across the frame, just isn’t fixable this way. Same with a photo that started out at 200 pixels wide. An AI tool can upscale it and sharpen it. Sure. But at that point it’s guessing at texture, not recovering anything real. A slightly soft phone photo is a different story. That one usually comes back looking genuinely sharp, because most of the actual detail was there to begin with, just softened.
How to Fix Blurry Photos Online with AI (No Photoshop Needed)

This is the part where Photoshop just isn’t necessary. A browser tab does the whole job.
Open the tool on your laptop or your phone, doesn’t matter which, and drop the file in. Nothing to install. Whatever format came off your camera roll usually works as-is, JPEG, PNG, even HEIC from an iPhone. The tool scans the image for edges, faces, texture. Then it rebuilds detail around them. If the blur comes specifically from motion or missed focus, a dedicated deblurring tool targets that instead of running one blanket sharpen filter over everything. That’s usually why the result doesn’t come out looking “crunchy” around the edges, which is the telltale sign of a generic filter pushed too hard.
Processing itself is quick, usually seconds, not minutes, since there’s no manual work involved on your end. Once it’s processed, check the before-and-after view. Don’t just trust it. Actually look. Still a bit flat? Run it again, or bump the strength up. When it looks right, grab the full-size download. No watermark to fight. No account wall for a one-off fix.
Matching the Fix to the Actual Problem

One generic “sharpen” button treats every photo the same. It shouldn’t.
Say a picture’s been re-saved a dozen times. Or it just wasn’t big to begin with. Sharpening alone won’t help much there. The underlying data simply isn’t present anymore. What actually works: clean up the compression noise first with a JPEG artifact remover. Then upscale the resolution to rebuild the missing pixels. In that order. Do only one of those, and the result is noticeably worse, since sharpening a noisy file just sharpens the noise along with it.
Old scans need a different read entirely. A scanned print, or an older digital photo, usually looks blurry just because it’s small by today’s standards. Not because anything moved when it was taken. Run it through an AI photo enhancer instead. Clarity improves, flat color gets corrected, and the result actually holds up if you print it bigger than a postcard.
There’s a third case worth mentioning: grainy, low-light photos where the noise itself is the problem, not blur exactly. Those often look blurry at a glance because the grain hides fine detail, and the same enhancement pass that fixes an old scan usually helps here too, smoothing the noise without flattening the whole image into mush.
Group photos deserve their own note. When one or two faces are soft while the rest of the group is sharp, that’s usually a focus problem rather than motion, the camera locked onto someone in a different row. A deblurring pass on the whole image tends to even things out, though it’s worth zooming into each face afterward rather than judging the photo as a whole. And screenshots of documents or text are their own category entirely, they respond better to something built for text clarity than a general photo enhancer, since sharp text has very different edges than a sharp face.
Blurry Photos in Everyday Situations

A few situations come up often enough to call out on their own.
Product photos for a resale listing or online shop are usually soft for one boring reason: the phone focused on the background instead of the item. A quick pass through a deblurring tool fixes this faster than reshooting, especially if the item’s already been returned or shipped back.
Photos downloaded from social media are almost always more compressed than the version someone originally posted, since most platforms compress on upload and sometimes again on download. Treat these like the small-and-compressed case: clean up the artifacts first, then rebuild detail, rather than expecting one pass to fix both problems.
ID photos, old passports, and documents scanned quickly on a phone tend to combine several problems at once, slight blur, uneven lighting, and low contrast. These usually need more than one tool in sequence, and it’s worth accepting that a document photo will never look as sharp as one taken with the express purpose of being sharp.
Pet photos are their own recurring headache, mostly because animals rarely hold still on command the way people do when asked. A dog mid-shake or a cat mid-jump usually means real motion blur rather than a focus miss, and a deblurring pass tends to help more here than a generic enhancer, since the problem is genuinely movement, not softness.
What Affects How Good the Result Actually Looks
A few practical factors decide whether a fix looks great or just okay, and none of them are about which tool you pick.
Original resolution matters most. A photo that started at a decent size gives the model more to work with. One that was tiny to begin with doesn’t, even if both look equally blurry on your screen right now. Lighting matters too. A well-lit blurry photo comes back sharper than a dim one. More real information in the pixels. Less guessing.
File format plays a smaller role, but a real one. A JPEG saved once holds up better than one re-saved five times across five different apps. Each save throws away a bit more. And the type of blur sets a ceiling. Mild motion blur or soft focus responds well, almost every time. Severe blur or heavy compression narrows what’s possible. No tool changes that.
A bad photo still isn’t hopeless. Just scale your expectations to what the source file actually has. Not every fix looks the same.
How Long It Takes, and What It Costs
Worth answering directly. It’s usually the first question anyone asks before trying a new tool.
One photo takes seconds on a browser-based tool. Not minutes. Not the hours a manual Photoshop retouch would eat up. No rendering queue. No plug-in to set up first. For casual use, fixing one photo or a handful, most tools cost nothing. Costs show up at higher volume. Batch processing dozens of images. Needing the largest output resolution for print work. For the one-off fix this guide is about, a rescued wedding photo, an old family picture, a product shot, free is the realistic expectation.
Fixing Blurry Photos on iPhone and Android
You don’t need a computer for any of this, honestly. Same tool, same steps, just pull it up on your phone’s browser instead. Grab the photo from your camera roll, or straight out of Google Photos. Works the same, just on a smaller screen. Quick tip: if it’s a Live Photo or came from a burst, scroll through the other frames first. The one right before or after the blurry shot is sometimes just… sharper. Five seconds, no tool required.
Here’s a habit worth picking up: fix the photo before you send it, not after. Group chats and messaging apps squeeze photos on the way out, and a sharp file survives that squeeze better than a soft one does. Wait until after you’ve sent it, and now you’re fixing blur on top of compression. Two problems instead of one.
Common Mistakes People Make When Unblurring Photos

A few habits quietly make results worse. None of them are obvious until you know to look for them.
Running the same photo through several tools, one after another, hoping one of them “sticks.” Each pass makes its own guess about texture. Stack enough guesses on top of guesses and it looks worse than just picking one tool and trusting it.
Uploading a copy of a copy. Every re-save, every screenshot of a screenshot, throws away information the AI can’t get back. If there’s any way to dig up a version closer to the original, even one generation removed, it’s worth the extra minute.
Judging the result at thumbnail size. A fix can look perfect small and still show soft patches at full resolution. The reverse happens too, some results look rougher zoomed in than they’ll ever look printed or shared. Check at the size you’ll actually use.
Expecting one setting to fit every photo. A strength level that looks great on a slightly soft portrait can look fake and over-sharpened on a photo that was already decent. Treat the strength slider as a starting point. Not a fixed answer.
When Fixing It Just Isn’t Worth It

Not every blurry photo deserves the effort. Might as well say that outright instead of pretending every fix is a win.
A photo where the face is turned away, or out of frame entirely, won’t get meaningfully better. No matter what tool touches it. There’s no face, no focal point, for the model to rebuild with any confidence. Extremely dark photos are similar. Almost nothing visible to start, so the tool often adds more noise than detail. In both cases, just keep the photo as a keepsake. Faster than chasing a result that was never going to look right.
A Few Habits That Prevent Blur Next Time

Fixing blur after the fact works. But a couple of habits at the moment of shooting mean less to fix later.
Tap to focus on the face or subject before you press the shutter. Don’t trust the camera to guess. One tap on the screen, on most phones, and it solves the exact focus-blur problem this whole guide is about. In low light, brace the phone against something solid. A wall. A table. Your other hand. The shutter stays open longer in the dark, so small movement shows up more than it would in daylight. And for anything moving, kids, pets, sports, shoot a burst instead of timing one shot. Picking the sharp frame afterward beats nailing the timing upfront.
Before You Hit Unblur

A few things worth checking first. Takes thirty seconds.
- Use the original file. Not a screenshot of a screenshot someone forwarded you.
- Figure out which kind of blur you’re dealing with. Motion, focus, or just low resolution. Each one needs a different fix.
- Keep the original around somewhere. Don’t overwrite it.
- Printing it? Export at the largest size available. Not whatever the preview defaults to.
- Peek at the file size before uploading. A heavily cropped or re-compressed copy never does as well as something closer to the original.
- Fixing a batch? Test the worst photo first. You’ll know fast if the tool’s actually going to help.
- And judge it at full size. Not the tiny thumbnail preview.
FAQ

Can AI actually unblur an image?
For motion blur or missed focus, yes. Usually convincing. For something badly smeared, or tiny to begin with, what you get back is a believable guess. Not the actual moment, recovered.
Is there a free way to fix blurry photos online?
Yes. Most tools let you upload, process, and download without paying, as long as you’re not doing it at industrial scale.
Do I need Photoshop to fix a blurry photo?
Not really, honestly. Photoshop takes practice before it looks right. A browser-based AI tool skips that curve and does the analysis on its own. That’s all you need for a one-off fix.
Photo still looks a bit soft after unblurring — why?
There’s a limit to what any tool can rebuild from a tiny or badly blurred source. Push the strength setting higher. Or accept the file was just too far gone to begin with.
Can I unblur a photo without installing anything at all?
Yeah, that’s kind of the whole point of a browser tool. Nothing to install. Nothing running in the background afterward, and no app sitting there taking up storage for something you’ll use once in a while.
Which AI tool should I actually use for a specific photo?
It depends more on the type of blur than on picking a single “best” tool. Motion or focus blur calls for a dedicated deblurring pass. A small or compressed file needs cleanup and upscaling together. An old scan or grainy shot responds better to a general enhancer. Match the tool to the problem — the brand name matters a lot less than people think.
Does the same trick work on a blurry screenshot?
Not quite. Text and documents have sharp, geometric edges, and a model built for photos wasn’t really trained on that. Expect more hit-or-miss results than you’d get on an actual photo of a person or a scene.
Is there a limit to how many times I can run the same photo through a tool?
No hard limit. But there’s a practical one. Each pass makes its own prediction. Beyond two attempts, you’re mostly amplifying artifacts, not recovering more real detail. If two passes haven’t helped, a third rarely does.
Will the fixed photo look as sharp printed as it does on screen?
Usually close. Not guaranteed. A screen is forgiving at normal viewing sizes. Print isn’t, especially anything bigger than a standard photo print, and it shows soft patches a monitor hides. Export at the largest size the tool offers if you’re printing. Check the result at full size before you commit to a print order.
Does it matter if the photo is in color or black and white?
Not really. The model rebuilds edges and texture either way. Color mostly changes how noticeable leftover softness looks to your eye, since color gives you an extra cue, tone, that black-and-white doesn’t have.
Bring Your Blurry Photos Back to Life

A blurry photo doesn’t have to stay that way, and it doesn’t have to sit in a folder because fixing it felt like too much effort. Upload it. Let the AI take a pass. Actually look at the result instead of assuming. Download it. Faster than it would take to explain what went wrong with the original shot in the first place.